


 222
222
Secure Print - MacOS
This Guide is to show you how to use the Secure Print Function on our Canon Printers on your macOS device. This function enables you to send a print job to a printer and not have it immediately print out onto the tray. Instead, you will send the job using these steps, and when you go to retrieve the document, you will provide a secure PIN code that you, as the user, set which will then release the document to be printed.
This is primarily used for secure/private documents that need to kept private in nature.
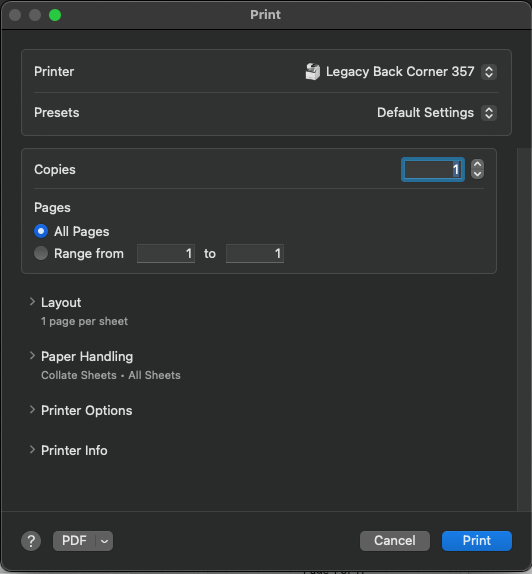
Step 1: Open the MacOS Print Dialogue Box
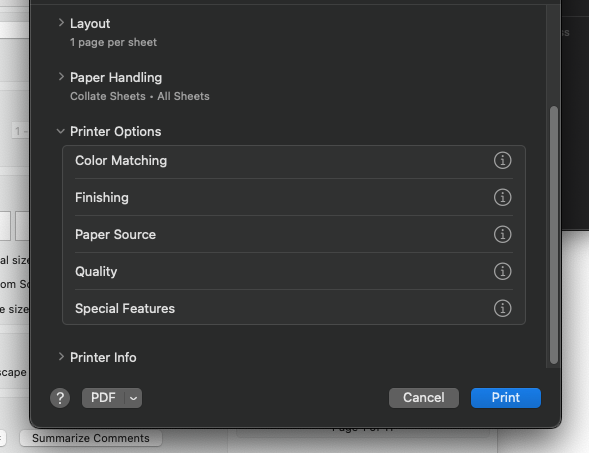
Step 2: Go to Printer Options & Select Special Features
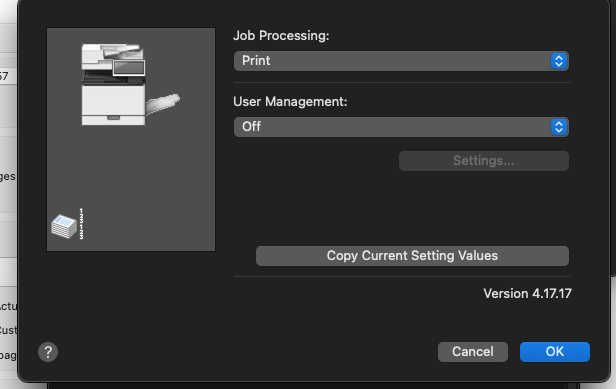
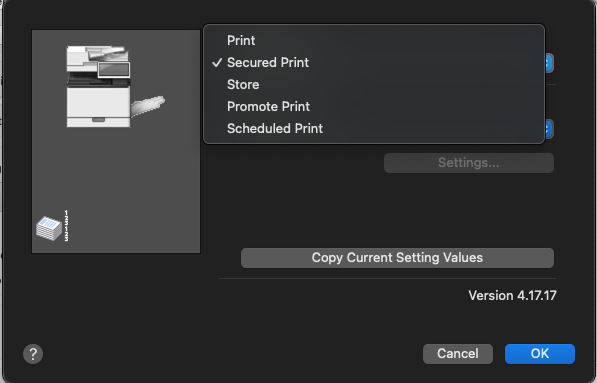
Step 3: Under Job Processing Select Secured Print and then press OK
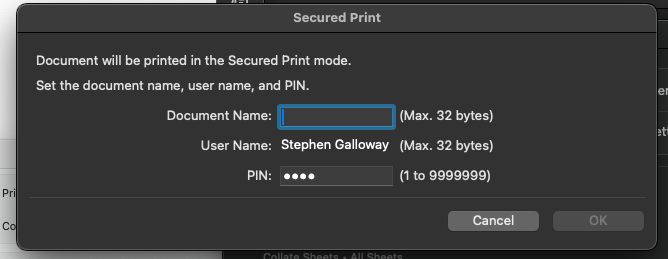
Step 4: Select Print and then Key in a Document Name and a Personal Pin Code that you will remember
Step 5: You can now finish your Print and send it to the Printer
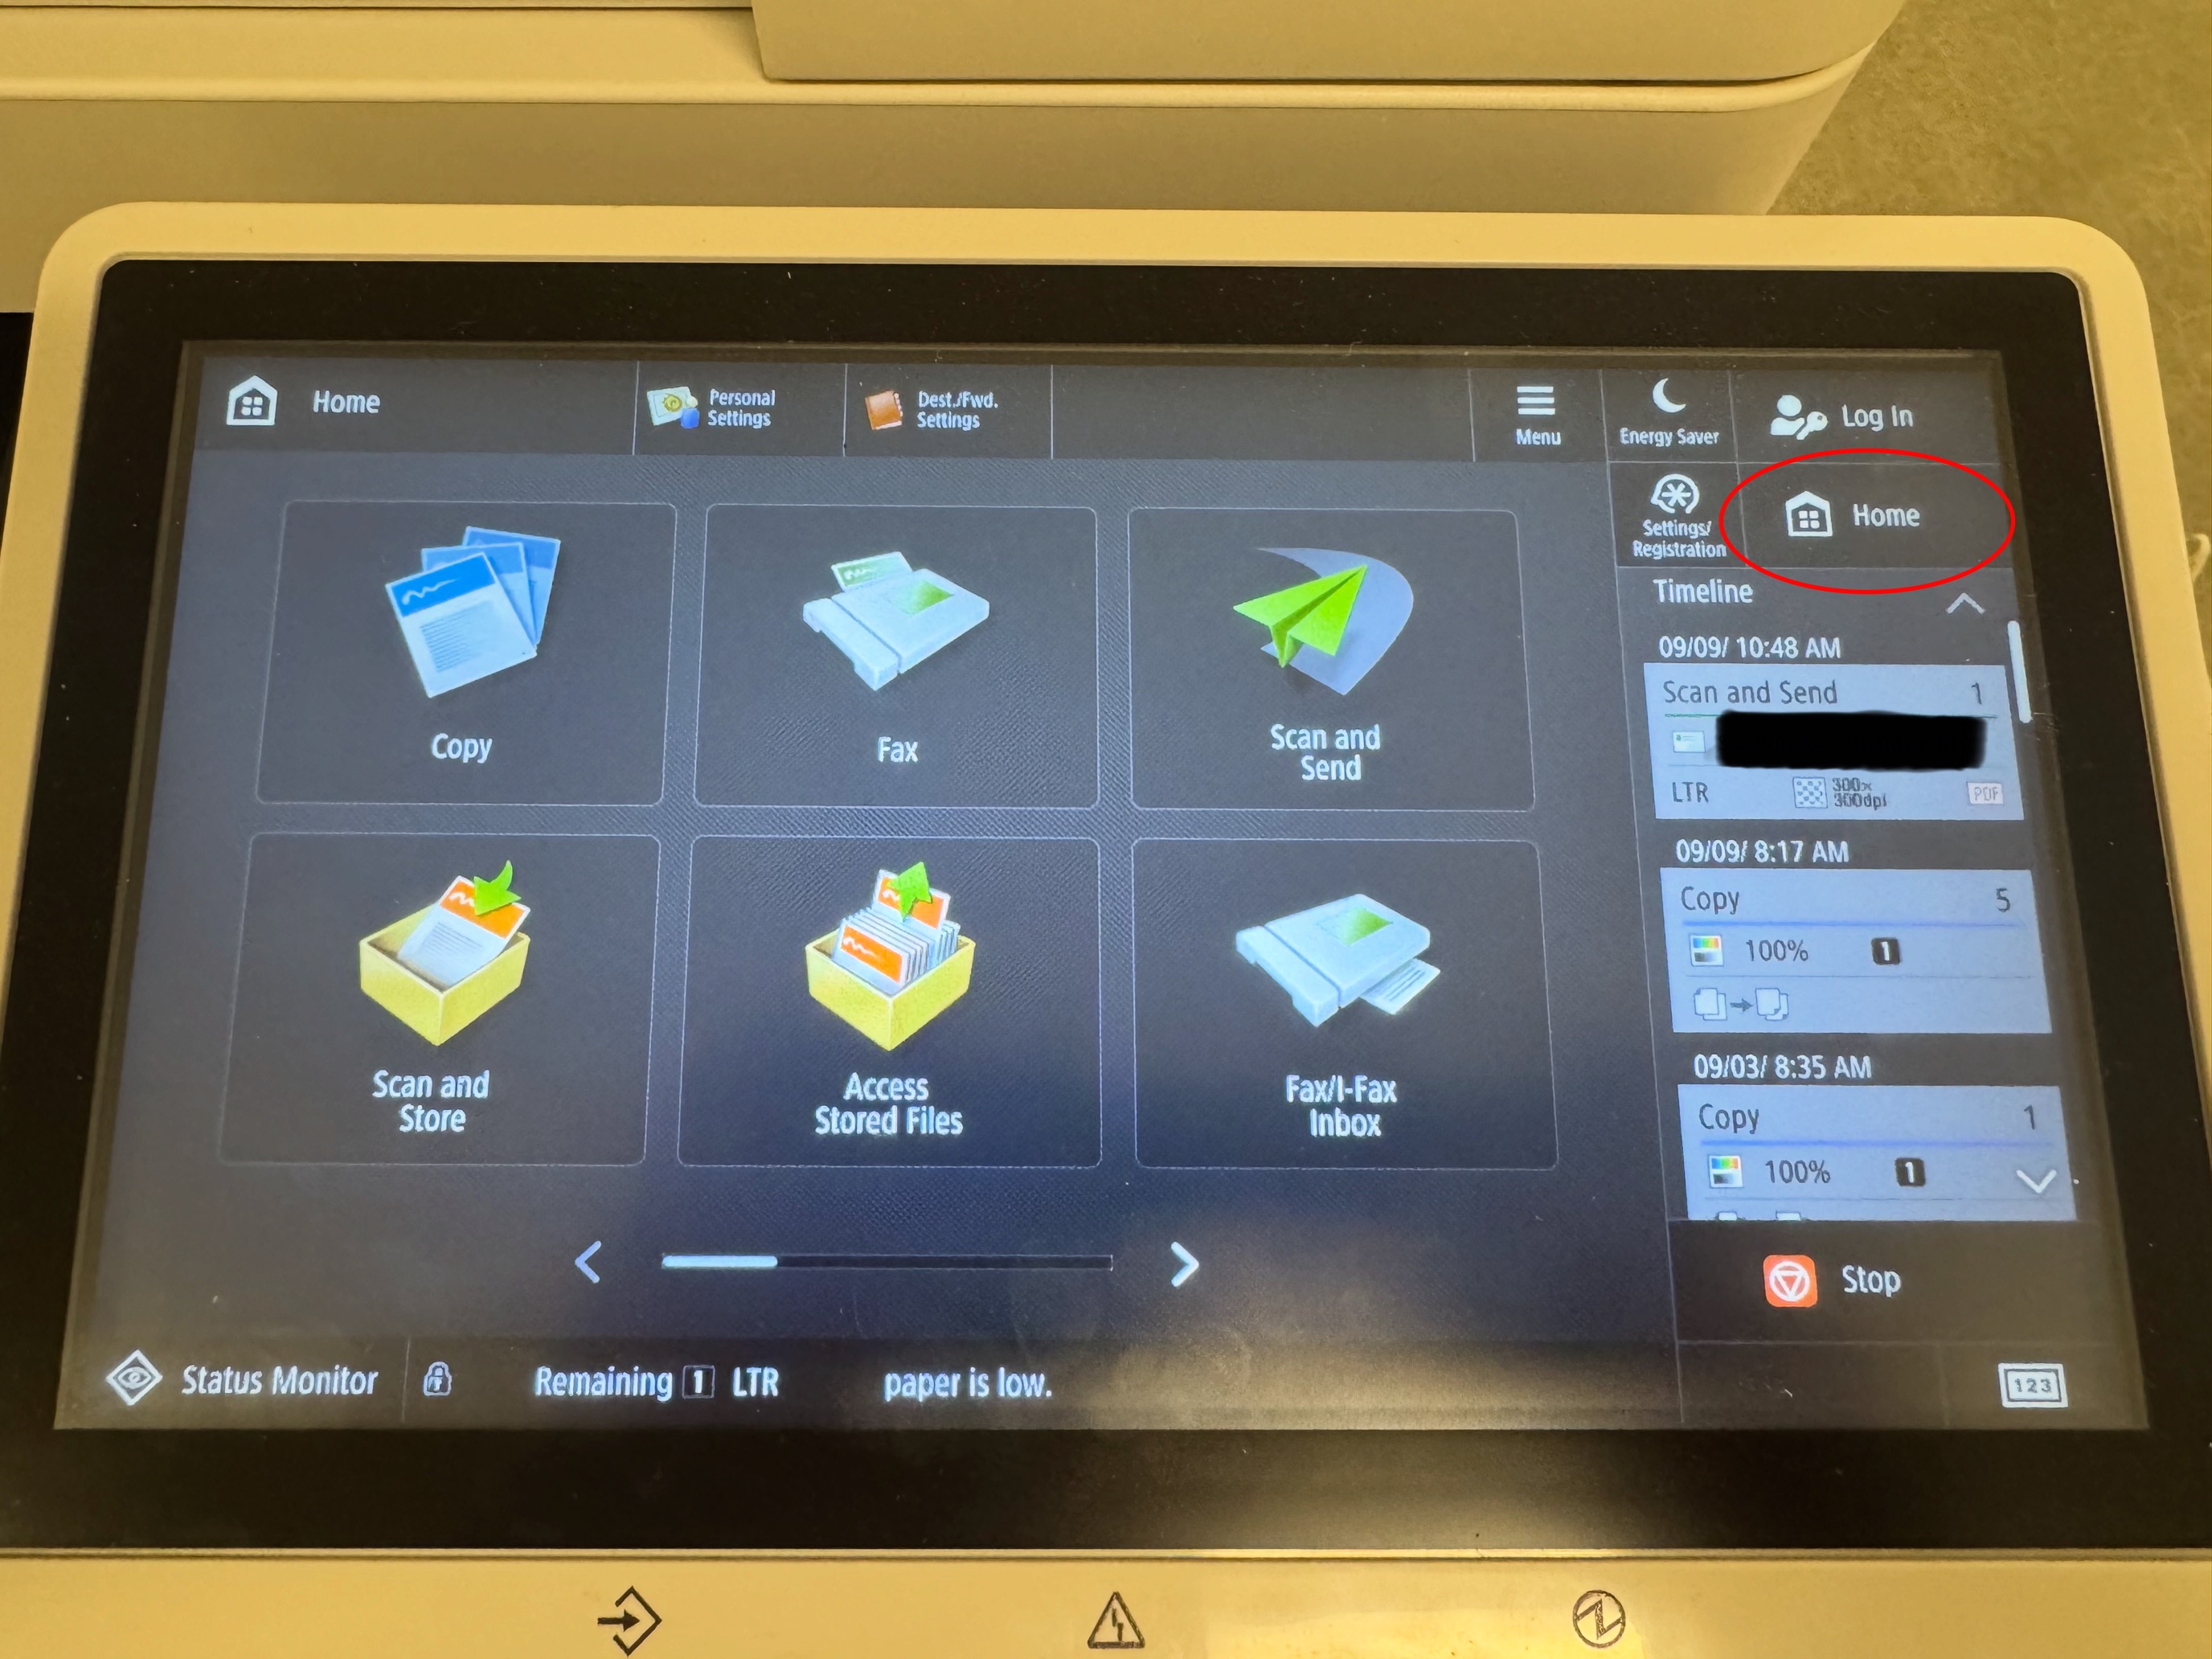
Step 6: At the Printer Press Home
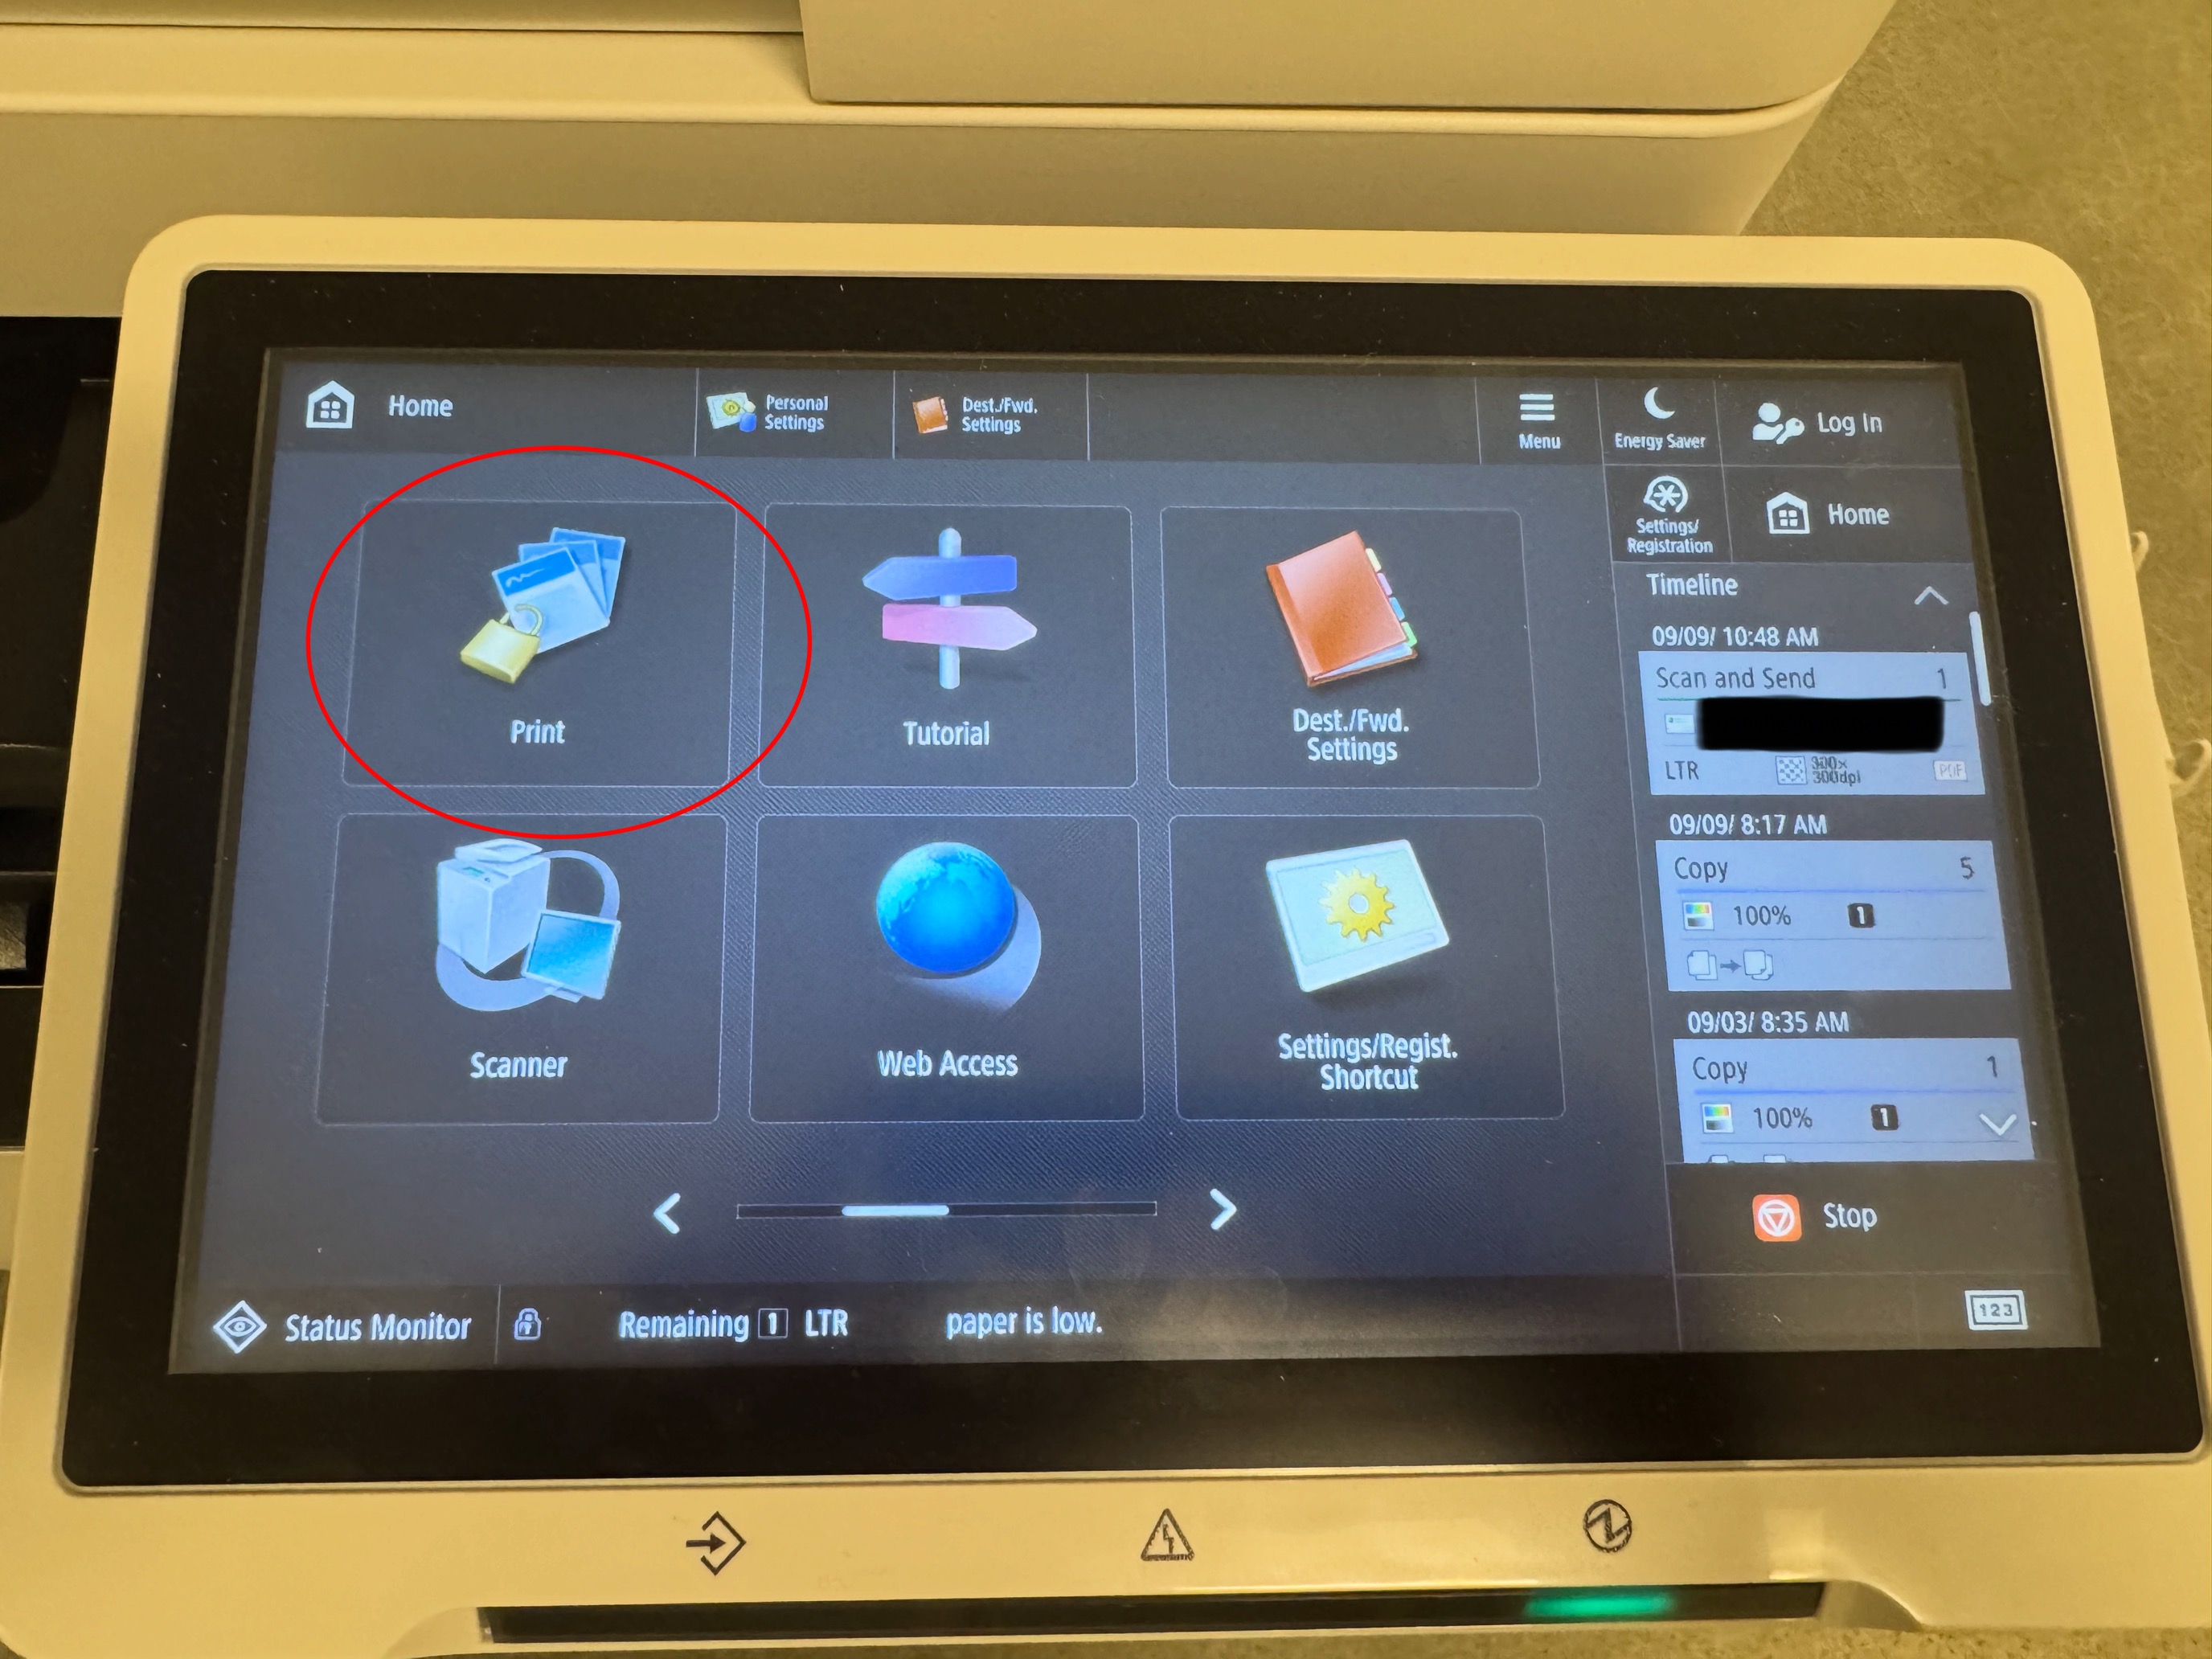
Step 7: Swipe on the Screen from right to Left and then Select "Print"
Step 8: Find your Document that you want to Print and Select it and Press Start Printing
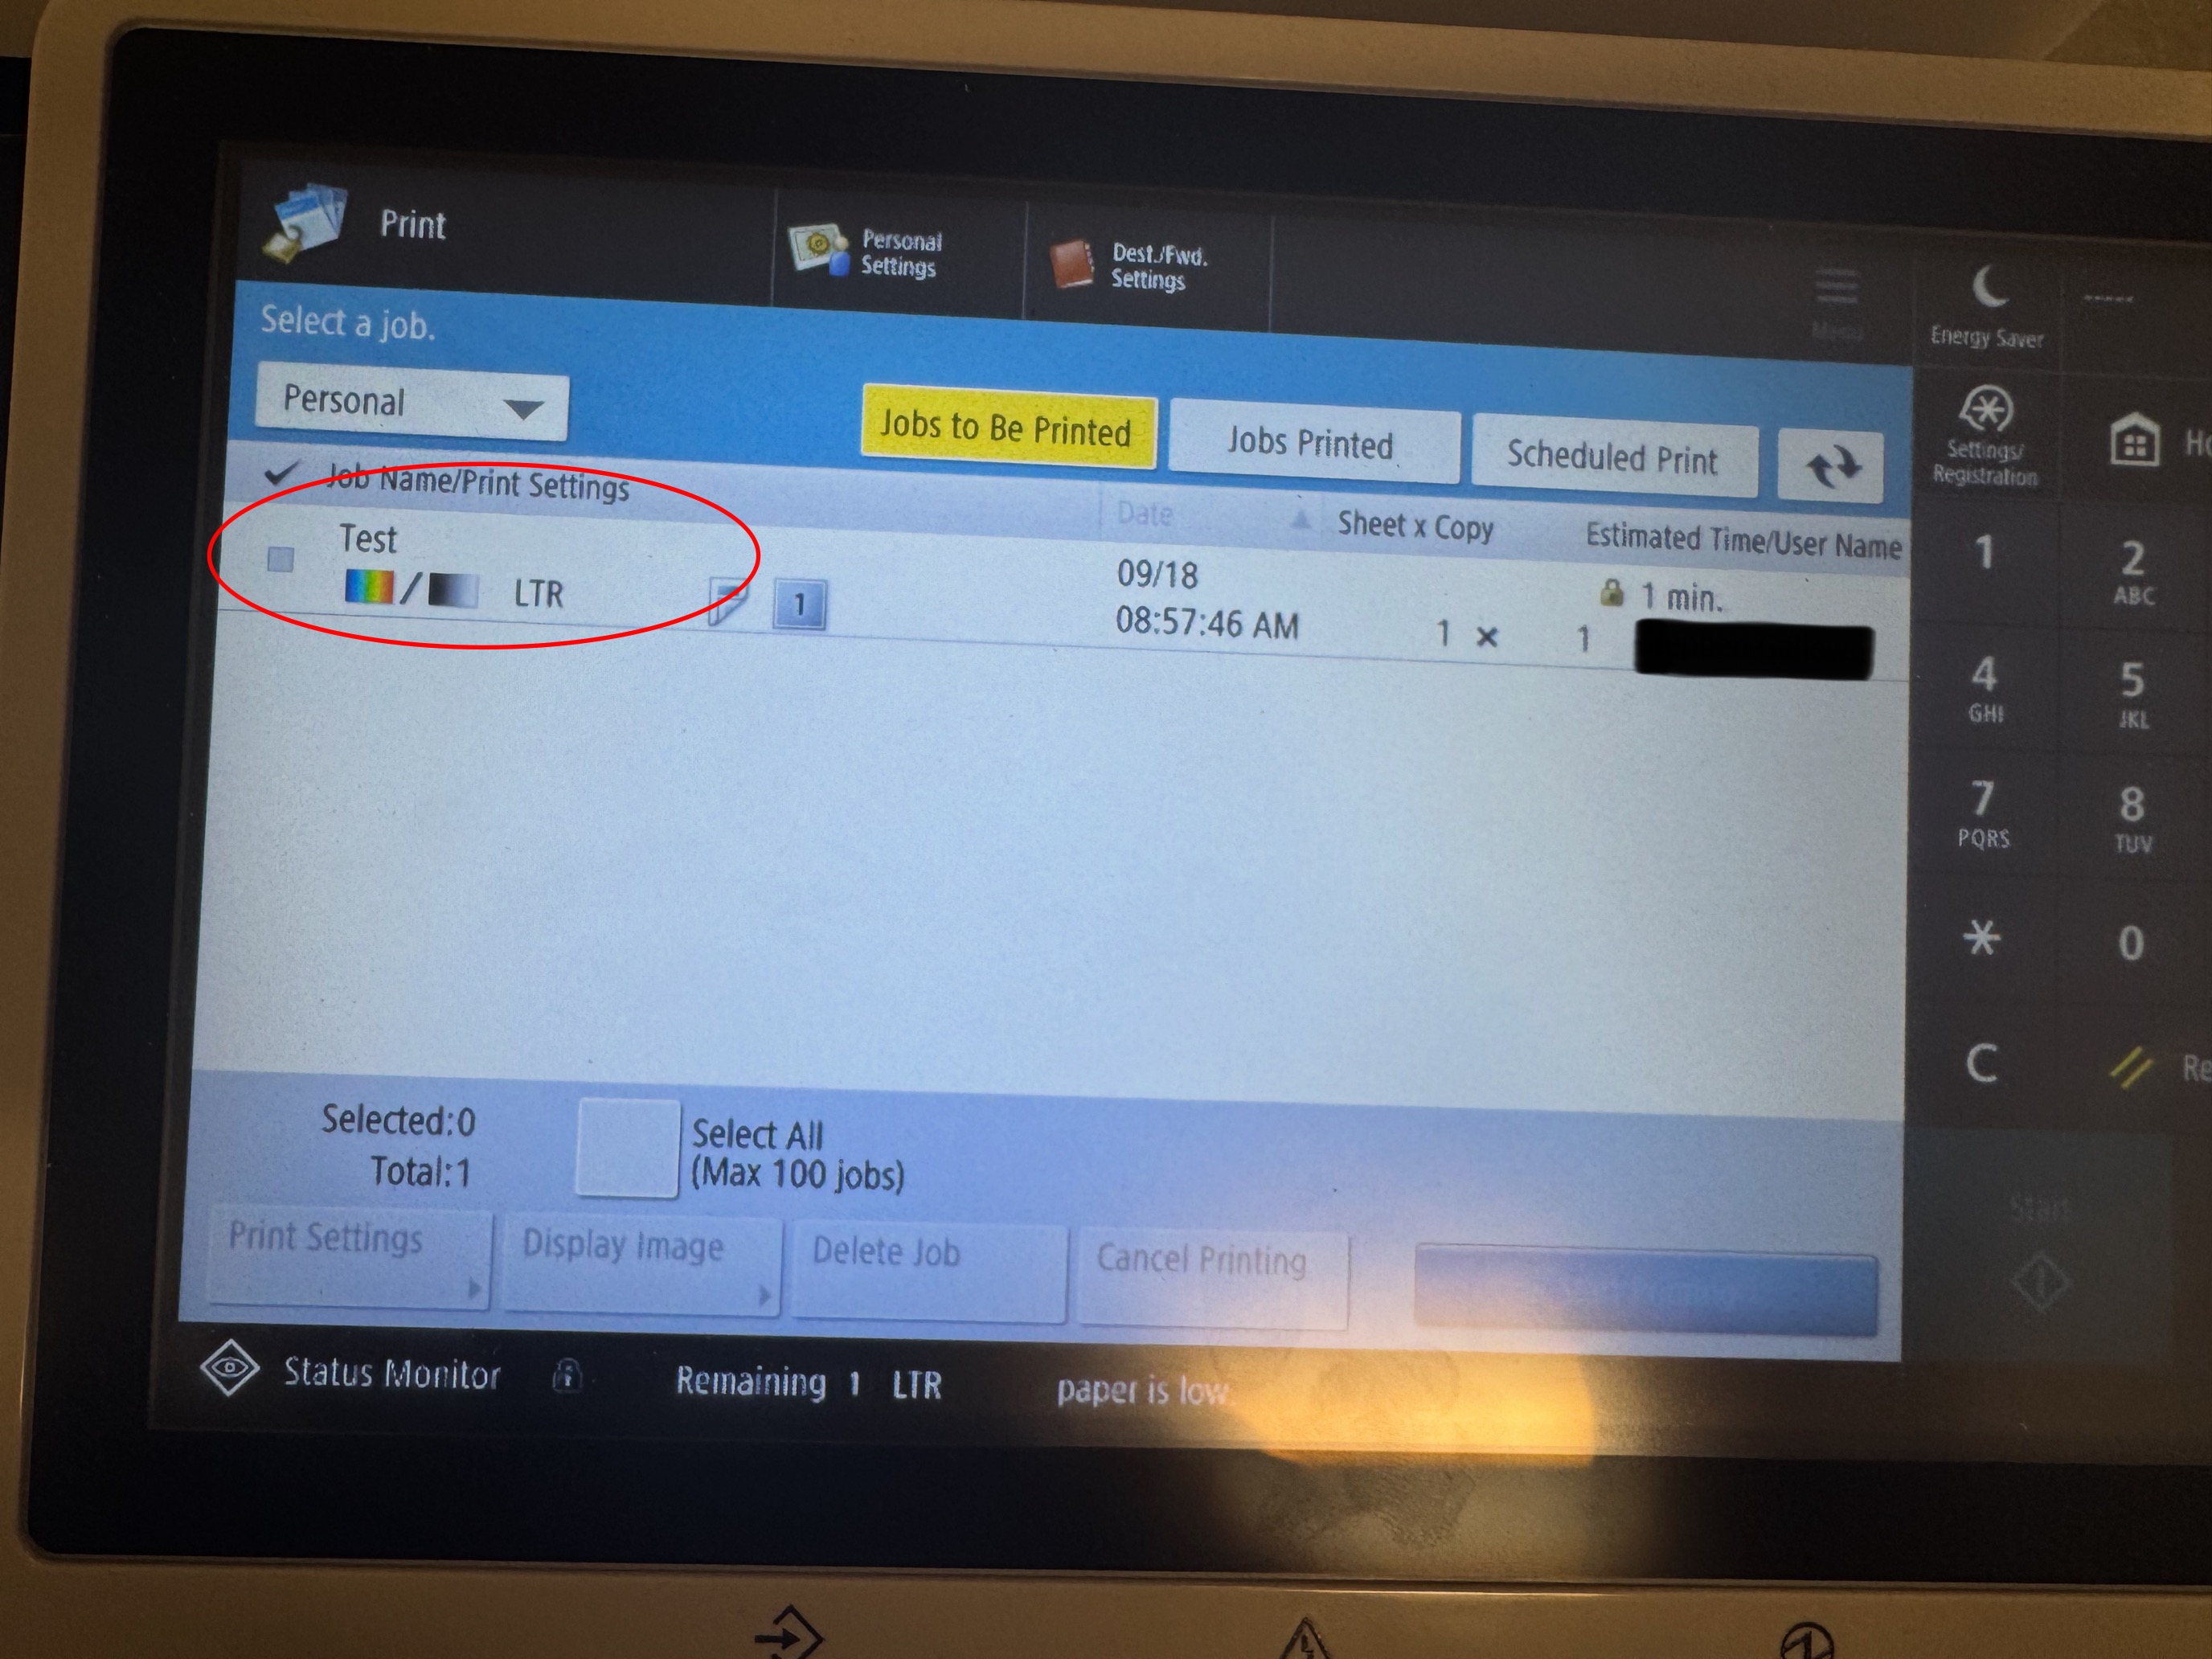
Step 9: It will now prompt you to enter your Pin that you set back in Step 4
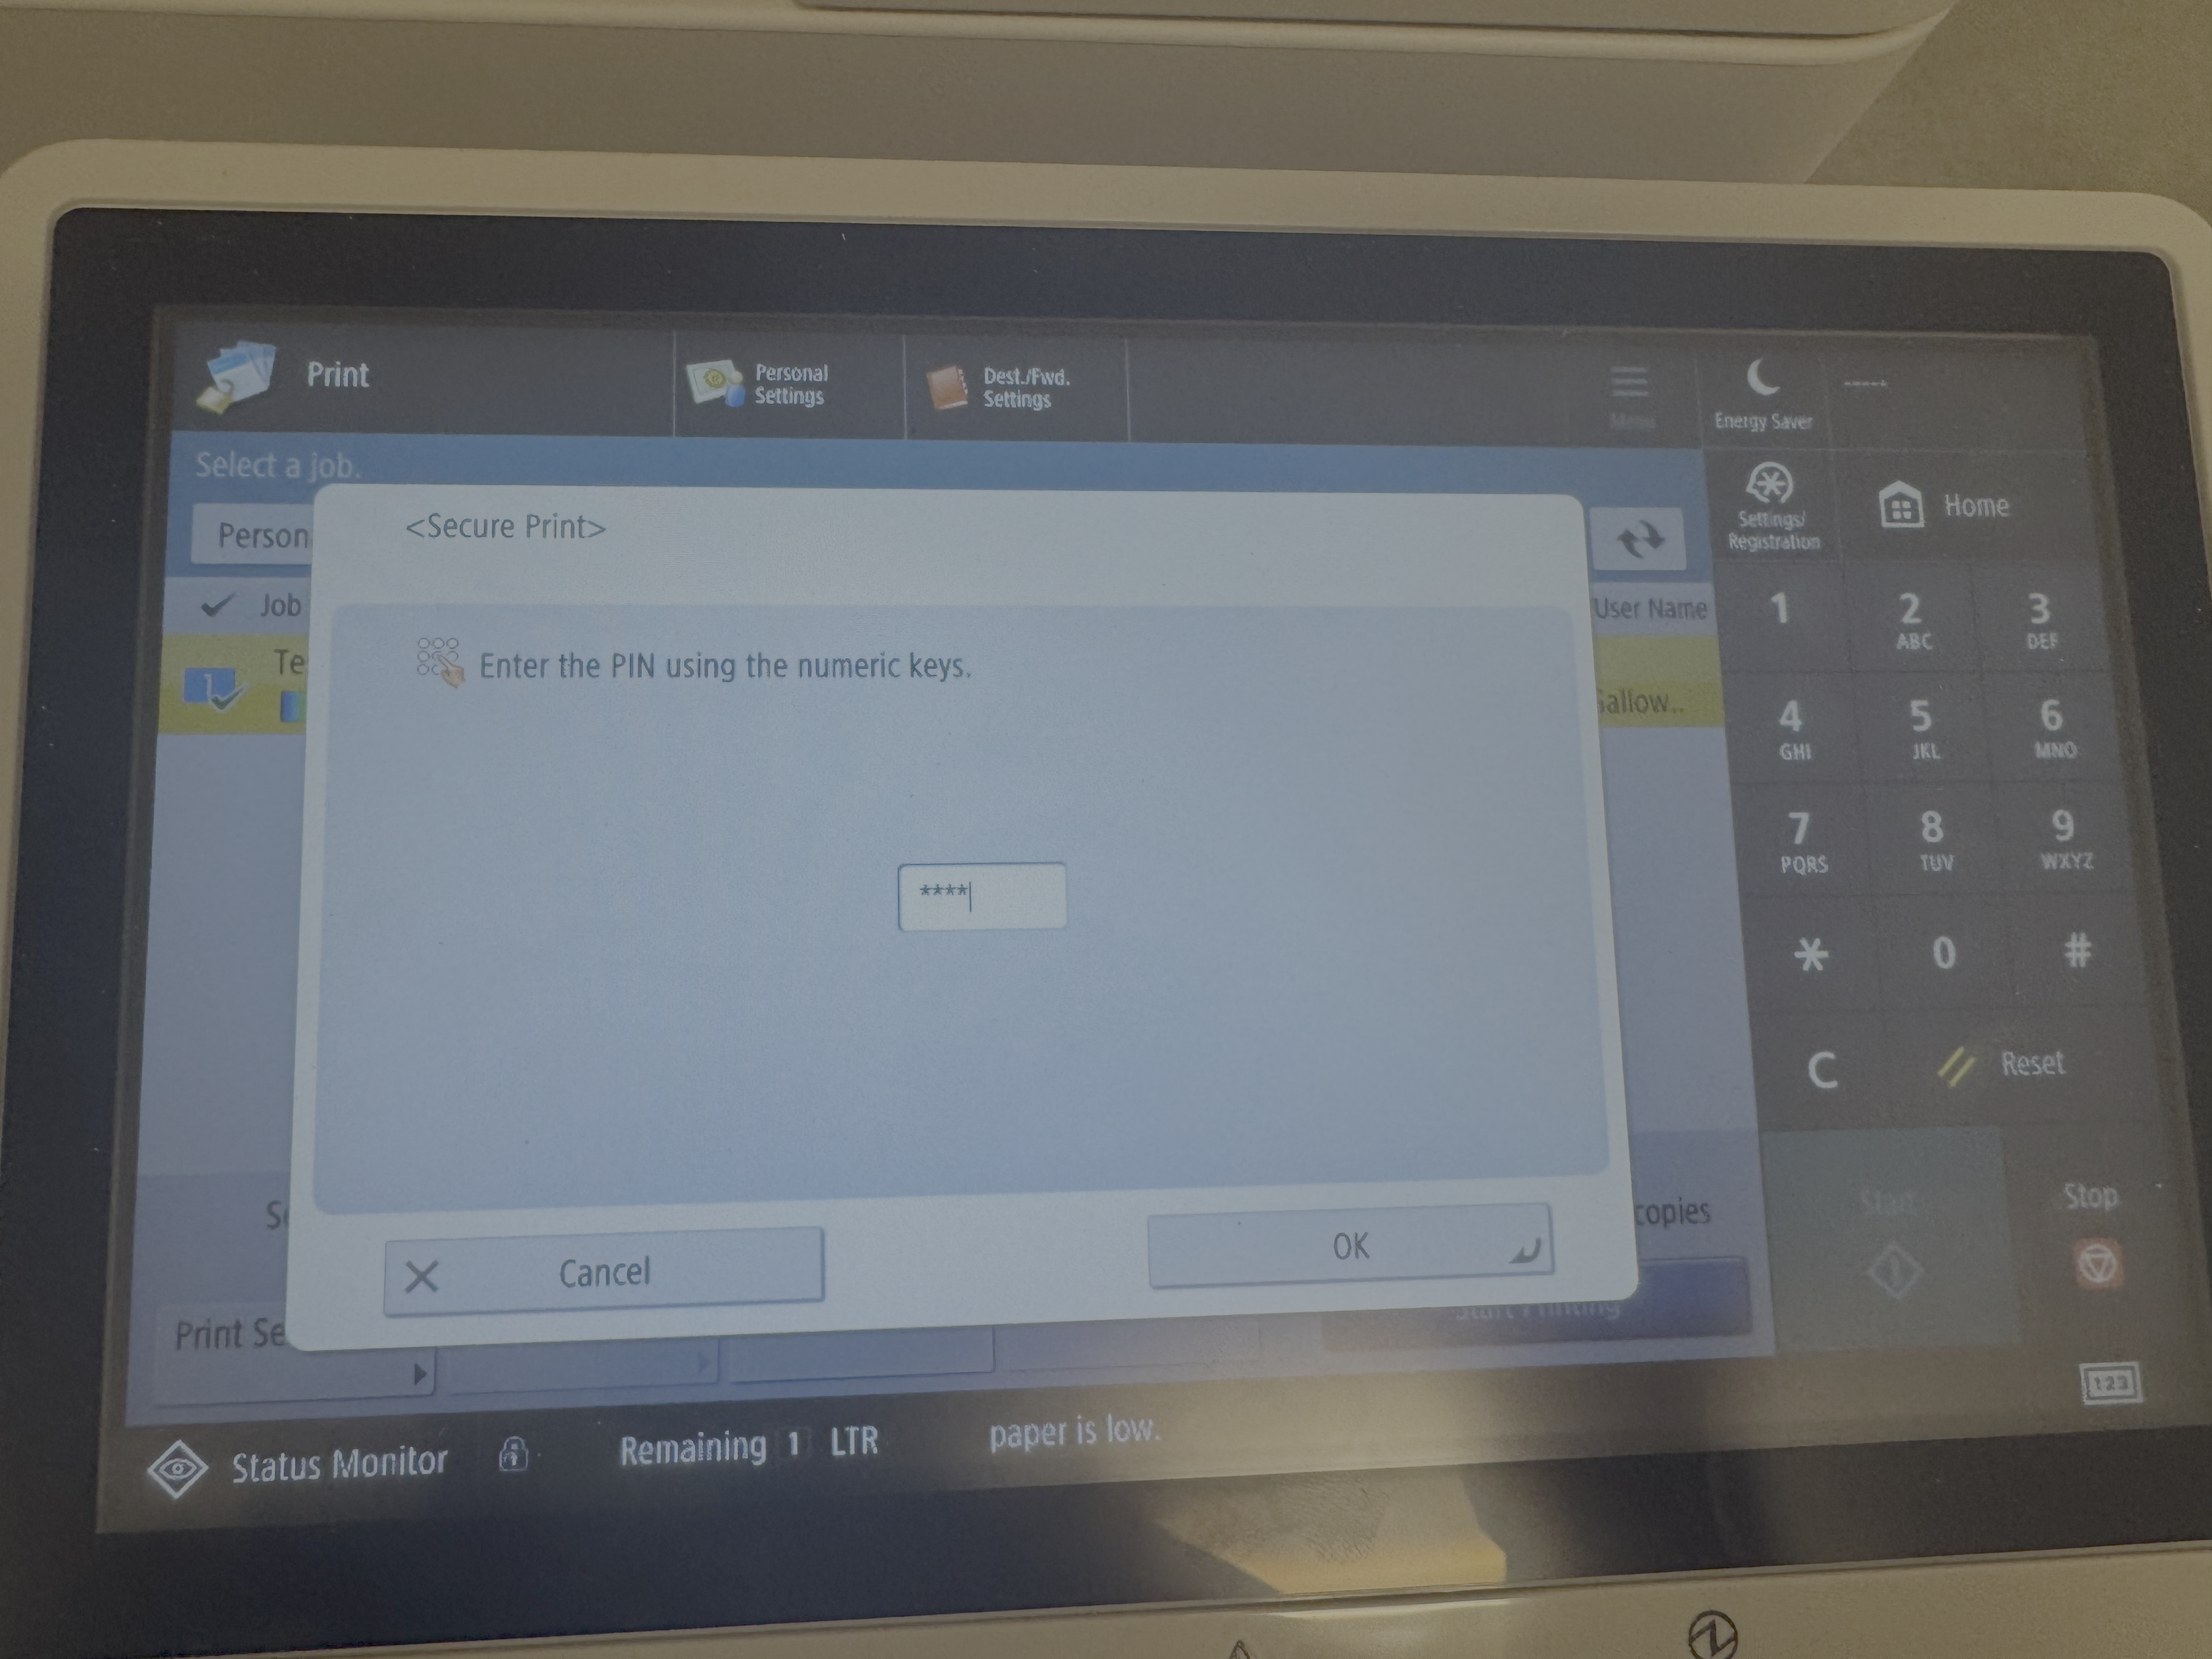
Done! Once you have confirmed your Pin and Pressed ok your document should now print for you
*If you have any questions or issues pertaining these instructions please submit a Help Desk Ticket and we will help troubleshoot as needed

