 482
482
When ever you need to Book a Conference Room there are a few different ways to go about doing that. You can either add a Room as a Required Attendee or you can put it into the Location Field in the Meeting. (See Picture Below)
When Selecting this way start with your Building Name and you will start to see Rooms that are in that building start to Populate.

You will need to define a Time and Date before selecting the Room and it will indicate if the room is availible during that time or not. An Alternative way to be able to Book a Room Is to use what is refferred to as the Room Finder. You can find those Instructions Below.
Booking Through Room Finder
-
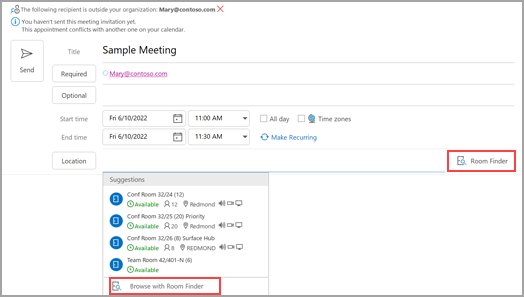
In a new meeting, add the Required attendees, the Start time and the End time, then click the Room Finder button at the end of the Location field.
Alternatively, you can click in the Location field and select Browse with Room Finder at the bottom in the list of suggested locations.

-
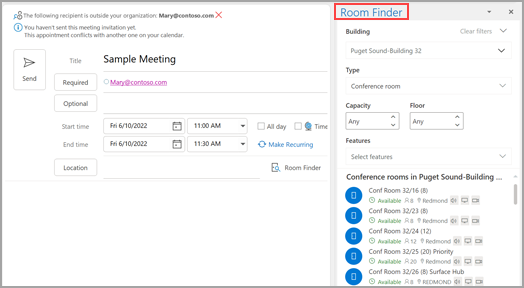
Choose the room specifics on the Room Finder. These conference rooms are set up by your Microsoft Exchange or Microsoft 365 administrator.

-
If the meeting has multiple attendees and busy conference rooms, it can be difficult to find a time that works for everyone. To find availability for people and rooms, select the Scheduling Assistant button on the ribbon, then select AutoPick and choose the appropriate criteria.
Note: This feature replaces the Suggested Times feature from earlier versions of Outlook.
-
After you find an appropriate time slot and add a conference room to the meeting, select Meeting on the ribbon. You can then close the Room Finder. When you're done setting up your meeting, select Send.


