 300
300
First things to know about files in Microsoft Teams
Teams makes it easy to work with and share the files your team produces and acquires. Here are some basics to get you started.
1. Find all your important files in one place
-
Select Files on the left side of Teams for quick access to the files you need.
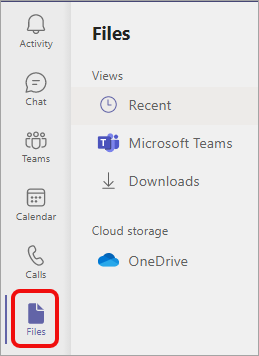
You'll have three views to choose from:
-
The Recent view displays the files you've recently viewed or edited.
-
Microsoft Teams displays all the files recently created or edited in your channels.
-
Downloads contains the files you've downloaded from Teams since your last sign-in.
Cloud storage provides access to the cloud storage services you've connected to Teams. Your OneDrive for Business account is included by default. If your org allows it, you can also add other cloud storage like Dropbox or Google Drive.
2. View the files from a single chat, channel, or meeting
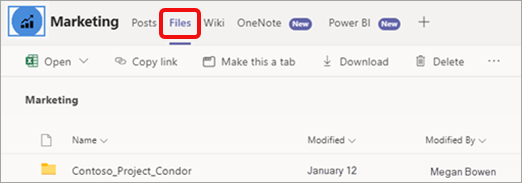
Every chat and channel has a Files tab at the top of the page.
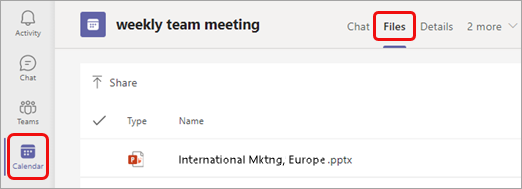
And once a meeting is over, the meeting event in the calendar has a Files tab too. Double-click the meeting to access the event info.
3. Share files throughout Teams
You can share files (of any type) with your teammates in chats, channels, and meetings. Everyone involved will be able to view the file, collaborate on it (if you set the file permissions for collaboration), and download it if they want to keep a personal copy.
There are three ways to share a file: attaching it to a chat message, uploading it to a Files page, or sending a link.
Attach a file to a chat
-
In any chat, select Attach
 beneath the box where you type your message and then follow the cues to locate and attach your file.
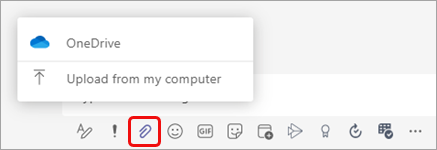
Or you can drag a file from your computer's file directory to the message.
Upload a file to a Files tab in a chat, channel, or meeting
-
Select Upload or Share (depending on the page), and then follow the cues.
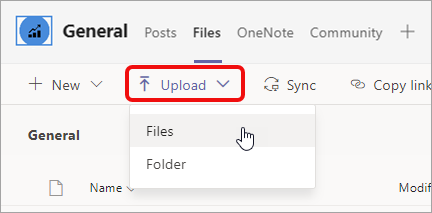
You can also drag a file or folder from your computer's file directory to the tab.
Send a link in a chat
-
Locate the file in Teams.
Note: If the file you want to link to isn't in Teams, you can first upload it to your OneDrive cloud storage. Alternatively, you can get a link from a file in another app and share it in Teams without uploading it.
-
Next to the file select More options
 and then Get link
  or Copy link (depending on the page you're on).
 -
Then paste the link into the chat.
4. Work with files directly in Teams
There's much you can do with your own files without leaving Teams, including moving, copying, and editing them. For the whole story, select More options  .
.

Depending on where you're accessing a file, who it belongs to, and how it's set up, you may see a different set of options when you select a file's More options.
Original Article:


